Showing posts with label Production Interactive. Show all posts
Showing posts with label Production Interactive. Show all posts
Wednesday, 23 November 2016
(Nearly) Complete Game!
I spent another full day assembling the Unity scene. Everything is now in the game and working (for the most part), however there are a few hiccups with the character currently. There are a lot of tweaks which could be made to the game at this point, a lot of which are inside of Unity or to do with the level layout/functionality of the game. But I'm very happy with the work I've done as the head of environment.

Monday, 21 November 2016
Level Setup
Because our head of level design isn't confident in Unity, I've taken over the job of the Unity assembly. Everything is very closed to finished and hopefully I can hand it back over to Gabe and he can set it up to match the grey blocking of the level we made previously.

Saturday, 19 November 2016
My Contributions!
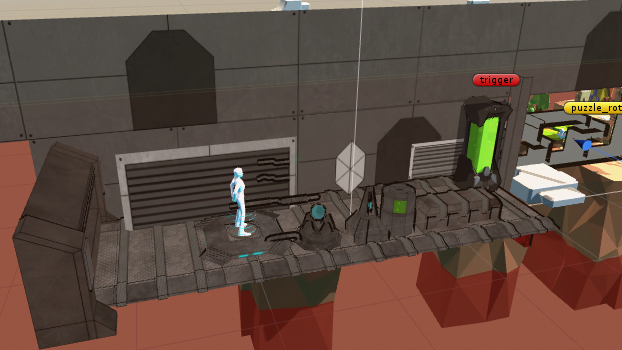
Here's a Unity scene with all of the assets I worked on/created for the group project. I was head of Environment Design throughout the project. :)
I textured and UV mapped everything shown here.
Modelled the character's outfit, the background, the pod and the barrel.
Gabe modelled the other assets.
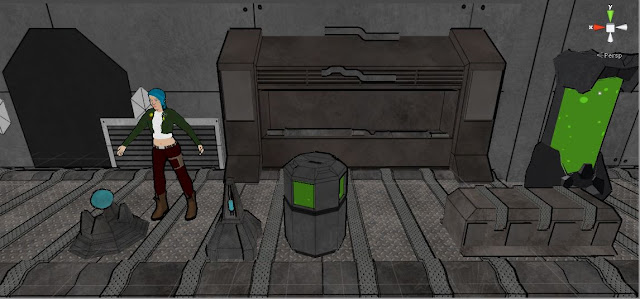
The project has been very difficult with only 3 members, but I'm happy with how the end result is looking and hopefully we'll be able to setup the game on time.
I textured and UV mapped everything shown here.
Modelled the character's outfit, the background, the pod and the barrel.
Gabe modelled the other assets.

The project has been very difficult with only 3 members, but I'm happy with how the end result is looking and hopefully we'll be able to setup the game on time.
Texturing Gabe's Models
I'm very pleased with how the texturing went for these assets, I spent a short while sourcing different metal textures and looking at examples to improve on what I'd done previously. The UVs also worked extremely well, a few errors popped up while I was doing the mapping, but there is little to no distortion in every asset.
While looking at metal textures I found that lighting and reflections are what makes or break a metallic texture, unfortunately the Unity toon-shader doesn't support lighting or reflections of any kind. So I really wish I'd had time to change the method we used for the toon outline.


While looking at metal textures I found that lighting and reflections are what makes or break a metallic texture, unfortunately the Unity toon-shader doesn't support lighting or reflections of any kind. So I really wish I'd had time to change the method we used for the toon outline.


Really happy with how everything looks together.

Backgrounds
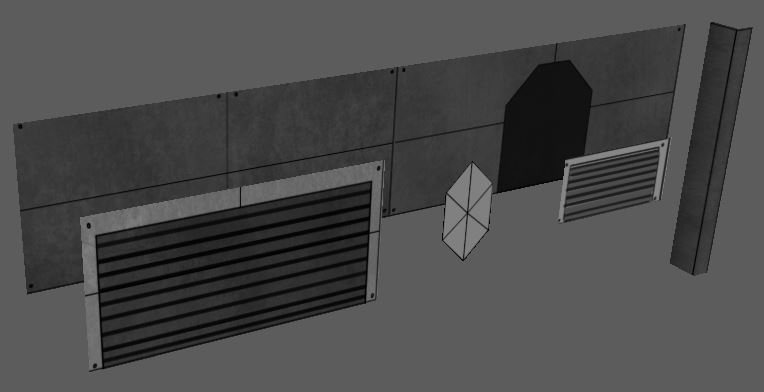
I made a few background planes & textured them, these will be sitting right at the back of the scene to fill up any empty space. Once again, this was before I'd received feedback on the textures for the Pod.

Cleaning Up Gabe's Models
Me & Gabe came to an agreement that he'd model a bunch of assets for the environment, then in turn I'd UV map and texture them. This worked out really well in the end, because there's a definite consistency to the style of everything.
I did have quite a bit of extra work to do on the models because there was a lot of unneeded topology and every piece of the mesh was a separate entity. This meant I had to combine the objects and then merge the vertices which was very tedious. In the end this came down to a misunderstanding between Gabe and myself, since he uses a different workflow to my own.
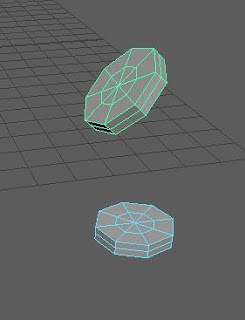
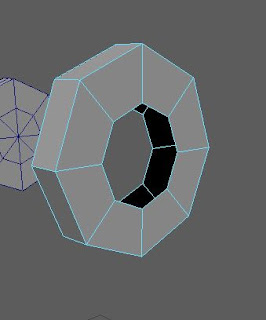
This is a small example of the kind of topology I was able to cleanup.
I did have quite a bit of extra work to do on the models because there was a lot of unneeded topology and every piece of the mesh was a separate entity. This meant I had to combine the objects and then merge the vertices which was very tedious. In the end this came down to a misunderstanding between Gabe and myself, since he uses a different workflow to my own.


This is a small example of the kind of topology I was able to cleanup.
Barrel Model
We needed more models to fill up our scene, so here's my contribution!
I made this before I received feedback on the Pod's texture, so it uses the same stone looking texture.
If I had more time I would revisit the textures for this & the Pod, but that's not possible this far into the project. I would also have liked to swap the toon-shader we're currently using with the Maya method, but again, there's not enough time remaining to change this.
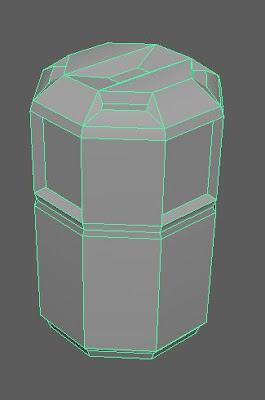

I made this before I received feedback on the Pod's texture, so it uses the same stone looking texture.
If I had more time I would revisit the textures for this & the Pod, but that's not possible this far into the project. I would also have liked to swap the toon-shader we're currently using with the Maya method, but again, there's not enough time remaining to change this.


Tuesday, 8 November 2016
Toon-Shaded Textures
Gabe exported the character rig & tested it in Unity, once the export was working properly I took a copy into my own project and tested the textures on it using the toon-shader.
I played around with the shader to adjust the thickness of the outline in different areas, and changed some of the shaders to toon-lit to make some of the darker textures stand out more. (Right picture is after the shader was adjusted on the holster and boots).
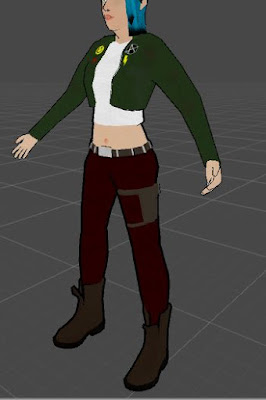

I played around with the shader to adjust the thickness of the outline in different areas, and changed some of the shaders to toon-lit to make some of the darker textures stand out more. (Right picture is after the shader was adjusted on the holster and boots).


Monday, 7 November 2016
Character Texturing
The group hadn't yet completely decided on a colour scheme for the character so I tried to do a mix between the final concepts Gabe & I had produced. I was really happy with the jacket shirt & skin, but the pants were looking really dull. Jacob & Gabe also mentioned the boots were far too dark and the character was missing a belly button. We had a small discussion and tried a few different tests and ended up deciding to go with dark red pants, similar to my original concept.
These are the original textures I showed the group.


Here's an updated version of the textures.


I also updated the texture on the hands, but it was more so to fix a seam that had appeared so the difference was barely noticeable. Gabe wanted to texture the hair & eyes for the character since he'll be able to reuse those textures later on.
Friday, 4 November 2016
Clothing Models
I was tasked with modelling the clothing for the character and was able to use Gabe's female model as reference. I ended up making a lot of adjustments to the model's proportions and used photo reference instead, however a few elements of Gabe's original model still remain. (neck, hands and stomach). Otherwise everything shown here was modelled by me.
Once the models were finished and the topology cleaned up I began UV mapping. It's hard to show off the UVs in a screenshot, but they came out really well with very little distortion and minimal seams.
Once the models were finished and the topology cleaned up I began UV mapping. It's hard to show off the UVs in a screenshot, but they came out really well with very little distortion and minimal seams.


Wednesday, 2 November 2016
Platforms
I started working on the platforms for the game. They still need a little polishing, but for the time being the results are good enough. Unfortunately the toonshader in Unity does not support the use of Normal Maps, and it's too late in the project to make a change to this.


Tuesday, 4 October 2016
Maya Troubles & Scene Assembly
I wasn't able to get the image sequence working in Maya despite trying many times to resolve the problem. It does however work correctly in unity, so my animation in Maya is missing this aspect.
Because the asset was being made to work in Unity I wasn't overly concerned, but it's something worth noting in case I ever need to use an animated texture.
I also assembled the Unity scene for our team in order to make everything easier, since we aren't entirely sure of how to use Gitlab at the moment. Everything looks good in the scene, however the assets made by the others will need to be textured in order to bring the standard of the project higher.

Thursday, 29 September 2016
Animating the Pod
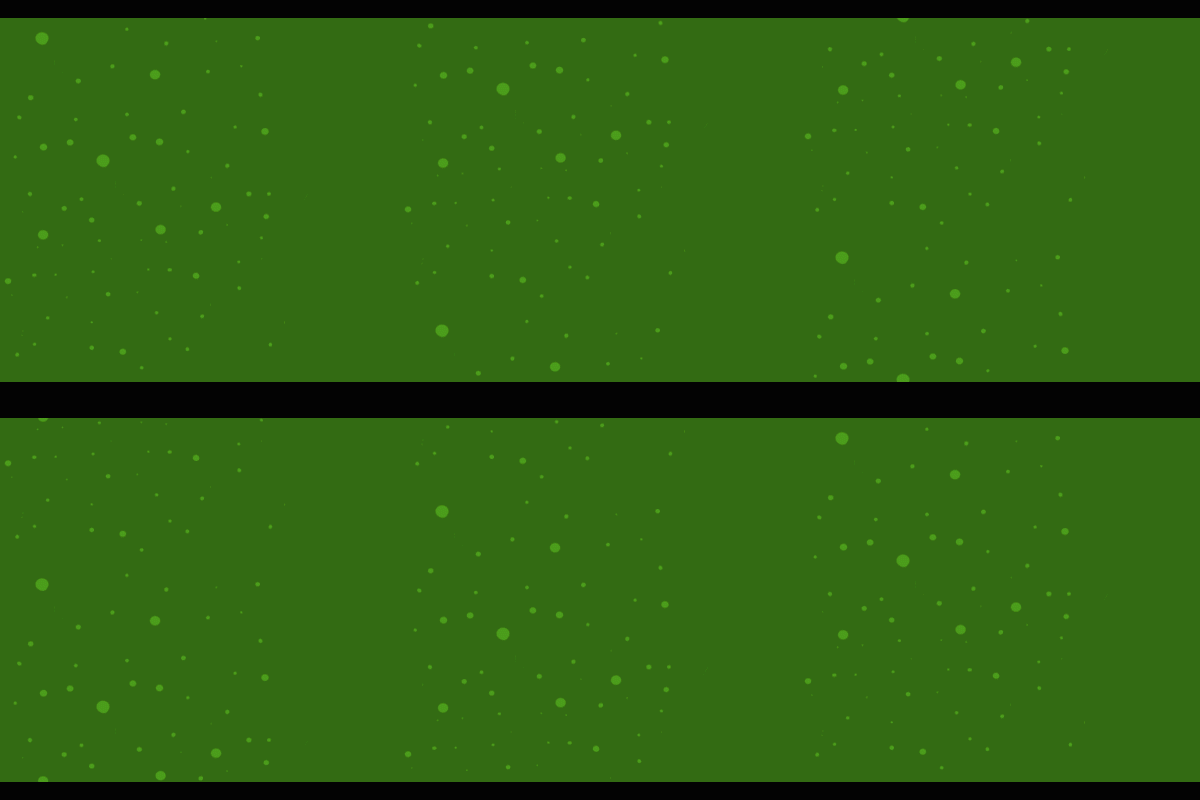
I created a png sequence using the texture in which I'd created from the pods UV map. I animated it in After Effects and exported it as a sequence. I had a lot of trouble getting an animated texture to work in both Unity and Maya. I tried to apply an image sequence to a material in Maya but for some unknown reason I wasn't able to get it to work. I then spent hours looking at different tutorials and methods to get an animated material working in Unity. I ended up having to re-write a JavaScript I found online to get the material to cycle through different textures. This proved to be a massive challenge, but I can now get it to work properly in Unity, although I still have no idea how to get it to work in Maya due to some weird error.
I made the moving parts different objects to make animating easier, Using a blendshape on the cylinder to stop it from dropping through to the ground.
I also had some issues importing the asset into Unity with it's blend-shape. It worked fine when I had the cylinder dropping through the ground, but that's impractical to use in a platformer as it may drop through to the floor below. I fixed this by converting the animation into Legacy.
Texturing the Pod


Texturing the metal of the object was really simple because of how I'd UV mapped everything. All I needed to do was block in colour and trace the UV lines with black. I imported it into Unity and played with the toon shaders to get different results. I ended up altering the textures to work with the toonshader. The images at the bottom are a comparison between with & without the toonshader in unity.
Modelling the Pod


I actually really enjoyed modelling this asset. I didn't run into any problems with it in this stage at all, I made sure to correct the topology as I went, and UV mapped it at several different stages so it wasn't a massive job at the end of it all. I think I did a really good job as it looks exactly the same as the model sheet. - Aside from the back plate which I added as a last minute change, I figured it was better to have it there so the top piece didn't appear to be floating once the tube dropped away.
Subscribe to:
Posts (Atom)