I've spent the last few days compositing everything and tweaking things in After Effects, I also:
- Created a background for the overlord reusing a piece of the finished Matte painting and renders of the pipes I'd animated.
- Created an effect for the title sequence and changed the font.
- Changed the font for the credits, animated the text and added a thanks to note.
- Along with Jacob & Matt, I did a bunch of motion tracking for the Matte Painting.
- I helped Jacob & Rhys to finish off the Matte Painting, which I then animated mist for in After Effects.
- Added a glow to Gabe's eye effect.
- Composited all of the shots and tweaked everything.
Showing posts with label Cinematic. Show all posts
Showing posts with label Cinematic. Show all posts
Thursday, 23 June 2016

Sunday, 19 June 2016
Colour Shift & Motion Tracking
I polished up the mask/motion tracking for this shot and redid the colour shift.
I ended up making several adjustment layers to recolour different areas of the shot, it was too difficult doing it with 1 because parts I didn't want the hue to shift on were being affected, while parts I did want, were not being affected.
Thursday, 16 June 2016
Colour Shift & Glitch Effect
During today's feedback session Dane suggested a few ideas for improving the laptop scene.
I still haven't created a background for it, I'll do this reusing a piece of the finished Matte Painting.
I still haven't created a background for it, I'll do this reusing a piece of the finished Matte Painting.
I have however, had some help from Hamish to create a bit more of a glitch effect, this isn't finalised yet I will be tweaking it.
I have also tested how it would look shifting the blue glow from the laptop to red, I think it looks pretty good. This will mean slightly more motion tracking needs to be done for this shot, the hardest bit will be getting the glow to work on Matt's arm when he closes the laptop lid.
Sunday, 12 June 2016
Synth Overlord Full Render
Gabe helped me set the lighting up for the shot, we've decided to render the Eye's glow in Maya as a separate layer. This will allow us to import it into After Effects and then alter it within the composition.


A lot of work
Since the last post I have been very busy, I've since;
- Adjusted Jacob's Eye glow to make it smoother, I just played around with a few effects and settings in After Effects. This still needs to be updated before it's final.
- Adjusted the Matte Painting, Thaw spoke to me & Rhys about the Matte Painting and ways to improve it, so I'm currently implementing his ideas into the Matte Painting.
- Re textured the body, arm and hands for X22 (The UV Map needed to be changed for these pieces).
[This involved adjusting the normal map in Photoshop to fit the new UV, as well as the original textures.]
- Started the Motion Tracking in After Effects, this was done really roughly I mainly did it as a starting point so whoever takes up this task can copy what I've done so far.
- Rigged the breathing motion for the Overlord, this was done using clusters and cluster-weight painting.
- Imported the Matte Painting into After Effects and Masked the window panels in the footage, I still need to adjust the perspective slightly but this is nearly finished since I'm able to reload the Matte Painting every time it's changed. I've started motion tracking Matt in front of the Matte Painting but this will hopefully be finished by another group member.
- I got everything ready to render for our feedback session, then rendered our entire scene. This was a big task that wasn't even assigned to me, I just did it because nobody else from my group were making an effort to do it.
- Adjusted the levels for all the footage in After Effects, this is something Dane kept mentioning for us to adjust, I didn't think it was overly important and was a low priority task. I eventually ended up doing it just so that it wouldn't be left until the last minute.
- Added the tint effect to create the infrared look in After Effects, this is the effect I'd planned on using for this shot from the very early stages of the project, this can do with a bit of touching up, but the tutors were happy with it in it's current state.
- Adjusted the Normal Map Rhys made for the Overlord, like I'd done previously with the Normal Maps for X22, I adjusted these in Photoshop to make them softer and less obvious.
- Animated the Overlord, I wanted to animate really subtle movements for the character to show he was alive and breathing, rather than over exaggerating the movements he'd make while he spoke. Gabe suggested I animate him similar to a news reporter, where their head stays centred in the camera while they speak.
- Imported the Overlord into After Effects, I'd already done a test for this so it wasn't too difficult, I used the Corner-Pin effect to correct the perspective of the shot. I also added this into a pre-composition so I'll be able to add the other assets quickly and painlessly.
- Once again I got everything ready to render, then rendered it all out for my group, as nobody else seemed to be making an effort. This ended up being late for the feedback session since I'd already spent the morning getting my own stuff rendered out and adding final touches to several things in the After Effects compositions.
- Textured the Overlord's face plate in Mudbox, this is something I started on a while ago but I decided to scrap it and texture it the same way we'd done the X22's armour, this way they'd share the same likeness and would look like they came from the same origin.
- Adjusted the Animation for the Overlord, after I received feedback on my animation I changed it to fit what Dane had recommended. He said that he understood I was trying to make the animation subtle, but it was far too subtle. His feedback was nearly identical to what Hamish had told me prior to the feedback session, so I feel like the animation for it is quite strong now- if no other faults were found with it.
- Animated the Pipes for the Overlord, I did this over the weekend as it was very tedious moving each control for the pipe, since there were 8 pipes and each pipe had 4 controllers, it left me a lot of work to do.
- Textured the Overlord, I did this using the same textures I'd used for X22, like the reason listed for the Mudbox texture, this was just to make them look as close to the same race as possible. It also meant less work for me, as I was able to reuse the work i'd done previously. I'll need to check with Gabe how the materials should be setup in Maya, as to match the attributes used with the X22 textures.
- Adjusted Jacob's Eye glow to make it smoother, I just played around with a few effects and settings in After Effects. This still needs to be updated before it's final.
- Adjusted the Matte Painting, Thaw spoke to me & Rhys about the Matte Painting and ways to improve it, so I'm currently implementing his ideas into the Matte Painting.
- Re textured the body, arm and hands for X22 (The UV Map needed to be changed for these pieces).
[This involved adjusting the normal map in Photoshop to fit the new UV, as well as the original textures.]
- Started the Motion Tracking in After Effects, this was done really roughly I mainly did it as a starting point so whoever takes up this task can copy what I've done so far.
- Rigged the breathing motion for the Overlord, this was done using clusters and cluster-weight painting.
- Imported the Matte Painting into After Effects and Masked the window panels in the footage, I still need to adjust the perspective slightly but this is nearly finished since I'm able to reload the Matte Painting every time it's changed. I've started motion tracking Matt in front of the Matte Painting but this will hopefully be finished by another group member.
- I got everything ready to render for our feedback session, then rendered our entire scene. This was a big task that wasn't even assigned to me, I just did it because nobody else from my group were making an effort to do it.
- Adjusted the levels for all the footage in After Effects, this is something Dane kept mentioning for us to adjust, I didn't think it was overly important and was a low priority task. I eventually ended up doing it just so that it wouldn't be left until the last minute.
- Added the tint effect to create the infrared look in After Effects, this is the effect I'd planned on using for this shot from the very early stages of the project, this can do with a bit of touching up, but the tutors were happy with it in it's current state.
- Adjusted the Normal Map Rhys made for the Overlord, like I'd done previously with the Normal Maps for X22, I adjusted these in Photoshop to make them softer and less obvious.
- Animated the Overlord, I wanted to animate really subtle movements for the character to show he was alive and breathing, rather than over exaggerating the movements he'd make while he spoke. Gabe suggested I animate him similar to a news reporter, where their head stays centred in the camera while they speak.
- Imported the Overlord into After Effects, I'd already done a test for this so it wasn't too difficult, I used the Corner-Pin effect to correct the perspective of the shot. I also added this into a pre-composition so I'll be able to add the other assets quickly and painlessly.
- Once again I got everything ready to render, then rendered it all out for my group, as nobody else seemed to be making an effort. This ended up being late for the feedback session since I'd already spent the morning getting my own stuff rendered out and adding final touches to several things in the After Effects compositions.
- Textured the Overlord's face plate in Mudbox, this is something I started on a while ago but I decided to scrap it and texture it the same way we'd done the X22's armour, this way they'd share the same likeness and would look like they came from the same origin.
- Adjusted the Animation for the Overlord, after I received feedback on my animation I changed it to fit what Dane had recommended. He said that he understood I was trying to make the animation subtle, but it was far too subtle. His feedback was nearly identical to what Hamish had told me prior to the feedback session, so I feel like the animation for it is quite strong now- if no other faults were found with it.
- Animated the Pipes for the Overlord, I did this over the weekend as it was very tedious moving each control for the pipe, since there were 8 pipes and each pipe had 4 controllers, it left me a lot of work to do.
- Textured the Overlord, I did this using the same textures I'd used for X22, like the reason listed for the Mudbox texture, this was just to make them look as close to the same race as possible. It also meant less work for me, as I was able to reuse the work i'd done previously. I'll need to check with Gabe how the materials should be setup in Maya, as to match the attributes used with the X22 textures.
To summarise, I've been very busy this past week, especially with the fact that I've somewhat taken over managing all of the After Effects work, I felt like I needed to do this because the way it was being done prior to my changes was a recipe for disaster, it was very likely to cause major issues when we began adding things to it, as we'd already had several problems regarding lost files from within the project.
I feel like I may have taken on too much work since I've had so many different tasks that I've needed to being working on simultaneously. I'm still quite annoyed that it came down to me to get everything ready for the feedback session, especially when the producer- nor anybody else, had made an effort to organise anything for the feedback session. I ended up having to work through our morning class getting everything ready on time (for both weeks), meaning I had to do work for this project rather than my own work for that class, which has now left me with even more work to do in order to catch up. Fortunately, I've managed to stay on top of the work load for this project at least, and have become very efficient at completing most of the tasks I've listed above. I was also able to find a few shortcuts, even reusing previous assets to save time.
Monday, 30 May 2016
Updated Pipe Rig
I added 2 extra controllers to the rig, this meant I had to redo parts of the already existing ones, so luckily I didn't make all 8 yesterday.
Here they all are now!


Here they all are now!


Sunday, 29 May 2016
Rigging the Synth Overlord
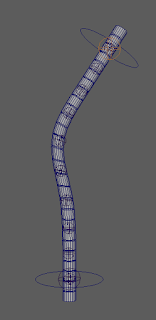
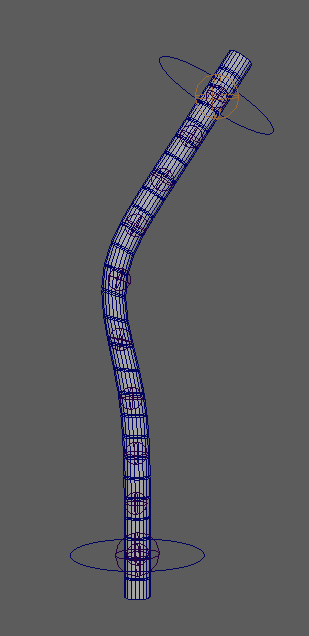
Gabe had the idea that we should rig the cables for the Synth Overlord so they aren't fixed in the same position for the duration of the animation. I rebuilt the piping for the overlord so that they were straight and able to be repositioned; rather than being posed static.
I wasn't sure how I should do this, but after a while I decided to use a ribbon spine; as we'd been shown how to do this by Keat previously. I ended up making a few mistakes while building the rig, however I was able to complete the second pipe in less than 5 minutes. I'll leave it at 2 pipes for the moment and check with our head of 3D (Gabe) that it'll do what we need it to before I make anymore.


I wasn't sure how I should do this, but after a while I decided to use a ribbon spine; as we'd been shown how to do this by Keat previously. I ended up making a few mistakes while building the rig, however I was able to complete the second pipe in less than 5 minutes. I'll leave it at 2 pipes for the moment and check with our head of 3D (Gabe) that it'll do what we need it to before I make anymore.


Thursday, 26 May 2016
Matte Painting Colour Test

Colouring the Matte Painting with a normal layer style.

Same painting with a "colour" layer style instead.
Fixing the After Effects Composition
Dane suggested we separate each shot into it's own After Effects Composition, then combine them in Premiere, rather than having everything in one After Effects file.
I wasn't sure how to do this, but it had gotten to a point where we needed this to be done urgently; as the way we were working with the composition was causing massive issues and only one person was able to work in After Effects at a time.
After messing around with the program for a while, I decided the best way would be to save separate copies of the composition then remove everything except for the footage needed in that shot. It didn't take that long once I'd worked out how to do it, and it's made things a lot easier to work with.
I wasn't sure how to do this, but it had gotten to a point where we needed this to be done urgently; as the way we were working with the composition was causing massive issues and only one person was able to work in After Effects at a time.
After messing around with the program for a while, I decided the best way would be to save separate copies of the composition then remove everything except for the footage needed in that shot. It didn't take that long once I'd worked out how to do it, and it's made things a lot easier to work with.
 |
| This is how it looked before hand. |
 |
| This is how it all looks now. |
Matte Painting Update


Thursday, 19 May 2016
Matte Painting Layout
This week Rhys and I have begun working on the Matte painting.
We were both initially doing designs for how the city would look, but we decided instead that I'd create the layout for the city while Rhys can begin designing the style of the city.
This is the layout for the city so far, painted over a photo.
[from https://www.flickr.com/photos/quandt/23101096024/]

We were both initially doing designs for how the city would look, but we decided instead that I'd create the layout for the city while Rhys can begin designing the style of the city.
This is the layout for the city so far, painted over a photo.
[from https://www.flickr.com/photos/quandt/23101096024/]

Sunday, 15 May 2016
Importing Rhys' Normal Map & Rendering
Rhys sent me the normal map for the Mudbox work he'd done for the flesh. I was really worried this wouldn't work properly since I had already made a normal map for the same piece since the right arm is connected to the main body; however I was able to combine the 2 maps in Photoshop and it worked perfectly without any alterations.
This is the end result for the Bump-Map in Maya. Rhys made the normal map for the flesh whilst I made the normal maps for the armour.

Once I had that done I imported the model into a scene Gabe had made for me, set up with the lighting and camera for the turntable, smoothed the mesh then rendered it.
Saturday, 14 May 2016
Normal Maps
I finished texturing everything in Mudbox. I didn't have too many problems, although one big issue I encountered was the mesh for the right arm/bicep wasn't working in Mudbox and no matter what I tried it wouldn't allow me to sculpt anything on it. This piece isn't overly important so I don't think it matters all that much if it doesn't have a bump map on it, if we need this doing then that piece will probably need to be remade in Maya.


Once I'd exported all of the textures as Normal Maps I took them into Photoshop and manually tidied them up with a soft brush. This made the texture look significantly better, before I'd fixed them there were really hard edges along the seams of the UV which made the texture look really messy.

The tidied Normal Maps in Maya with an updated texture.


Once I'd exported all of the textures as Normal Maps I took them into Photoshop and manually tidied them up with a soft brush. This made the texture look significantly better, before I'd fixed them there were really hard edges along the seams of the UV which made the texture look really messy.

The tidied Normal Maps in Maya with an updated texture.

Texturing Issues & Progress
This is the first time I've worked with the X-22 model since I'd created the hands for it. I had a lot of issues getting it to work in Mudbox correctly and even more issues with getting it to render. When I imported it into Mudbox I was greeted with several errors, the main two were an overlapping UV and a hidden n-gon which was preventing me from subdividing the mesh in Maya.


Luckily I was able to resolve these issues and began to work on the armour in Mudbox. I got a piece looking exactly how I was wanting it to, so I exported the Normal Map into Maya to see how it would look in there, and not surprisingly it looked disgusting.


I then looked up how to edit Normal Maps in Photoshop and managed to clean up the Map to a point where I'm happy with how it looks. Unfortunately the legs aren't UV mapped the same way so I will have to texture both of them individually.


Another issue I ran into was rendering using MentalRay as the Shader was missing from the material it was attributed to. I reapplied a material to the mesh and was able to quickly recreate the one Gabe had made previously.

Once I'd finally got all of that working I decided I'd do a test of a batch render to make sure I wouldn't run into any problems just before the deadline. I'm so glad I did this because the render wasn't working at all, it was only rendering out occlusion passes for some unknown reason.


After spending ages trying to find what the problem might be my friend suggested I look under the layers in the Maya file which is where I found all of these layers which Gabe had used to test a render earlier in the project. The reason none of the renders were working was because the normal render layer had been hidden in order for the occlusion renders to be used, which had most likely been forgotten about.
.
The render finally worked and the texture is looking good so I'm finally able to start the final texture in Mudbox.


Luckily I was able to resolve these issues and began to work on the armour in Mudbox. I got a piece looking exactly how I was wanting it to, so I exported the Normal Map into Maya to see how it would look in there, and not surprisingly it looked disgusting.
I then looked up how to edit Normal Maps in Photoshop and managed to clean up the Map to a point where I'm happy with how it looks. Unfortunately the legs aren't UV mapped the same way so I will have to texture both of them individually.
Another issue I ran into was rendering using MentalRay as the Shader was missing from the material it was attributed to. I reapplied a material to the mesh and was able to quickly recreate the one Gabe had made previously.
Once I'd finally got all of that working I decided I'd do a test of a batch render to make sure I wouldn't run into any problems just before the deadline. I'm so glad I did this because the render wasn't working at all, it was only rendering out occlusion passes for some unknown reason.
After spending ages trying to find what the problem might be my friend suggested I look under the layers in the Maya file which is where I found all of these layers which Gabe had used to test a render earlier in the project. The reason none of the renders were working was because the normal render layer had been hidden in order for the occlusion renders to be used, which had most likely been forgotten about.
.
The render finally worked and the texture is looking good so I'm finally able to start the final texture in Mudbox.

Texturing Bone Armour
I spent Thursday & Friday texturing the armour for X-22 in Photoshop. I used a solid colour for the base layer and then painted over it with the brush I had made earlier, I layered a few different colours to give the texture a bit of depth but the process was relatively straight forward. I still need to texture the armour in mud box, but after that this stage should be done!


Monday, 9 May 2016
Basic Texturing
I've tidied up the texture in mudbox and taken Dane & Keats feedback into consideration, smoothing out the areas around the lens and making the texture less obvious/smaller. I've also spent a small amount of time making a mockup of the texture in photoshop to see how it will look in Maya. I'm pretty happy with it at this point and will be doing work on it at a later stage.


Thursday, 5 May 2016
Texturing Tests
I've spent this week testing textures for the Synth Overlord model. I haven't used mudbox before so this has been a bit of a learning curve for me. We're aiming for the armoured plates of both Synths to resemble a bone texture whereas the rest of the materials will most likely be metallic and wont need to be textured as such. Since we haven't had a day with all of the group present we haven't been able to decide on the final texture. I've gathered a few bone textures and have even made my own Photoshop brush to help create the texture for when we're able to come to a final decision.


Thursday, 14 April 2016
Rough Footage Composite
I made a rough composite of our footage to test the timing of the shots and to see how well they work together. I think there will be a few shots which will need to be cut out to shorten the time and a few cuts which aren't necessary. For the most part I'm pleased with how it's looking, most shots turned out really well.
As a note, the sound is unedited so it doesn't sync correctly, and the shots are a little dark as I haven't made any adjustments to the light values yet.
As a note, the sound is unedited so it doesn't sync correctly, and the shots are a little dark as I haven't made any adjustments to the light values yet.
Wednesday, 13 April 2016
UV Mapping & Filming Progress
This week most of my time was spent filming with the rest of my group. The first night we shot (7th April) it took us a long time to set up the lighting and the room for filming. Between the three of us we had to move all of the desks to one side and clear out space for certain shots. The biggest difficulty we had was with the lighting, since our animation is set at night we were wanting as little light as possible, however the camera couldn't pick up anything with such little lighting, so we had to set everything up without any planning. We also ran out of time to do a lot of the shots since the building closed at 9:30 and we could only film once it was dark, so we had to do another filming session. Luckily setup went a lot smoother the second time round since we had an extra crew member and Matt had taken photos of all the lighting and setup we had used previously.
I also did the UV Mapping for the Synth Overlord, however this took absolutely no time at all since it is only being seen at one angle. I was pretty much able to planar map the mesh, then after a little bit of tidying up it was finished.
We were scheduled to do texturing this week but I'm planning to do that over the break so I'll be able to learn a bit more Mudbox first.


Tuesday, 5 April 2016
Test Shooting & Effects
Yesterday we did a bunch of test shooting and room tests. We all looked at the locations and decided that the office was too small, the theater was too big, and the classroom was just right. So hopefully we'll be able to film in there rather than having to use the office.
Matt was the camera operator yesterday and will primarily be the one leading the live action part of the film due to his expertise in that area. I've taken some of his footage and begun playing around with it in after effects/photoshop to get an idea of how the editing side of the process will go.
One thing to note is that these were filmed/photographed during the day, we'll have to test lighting later on, which Rhys & Jacob are in charge of (according to the schedule).
X-22 Perspective Shot

One thing to note is that these were filmed/photographed during the day, we'll have to test lighting later on, which Rhys & Jacob are in charge of (according to the schedule).
X-22 Perspective Shot

Establishing Shot/ X-22 Perspective
Subscribe to:
Posts (Atom)